- Key Takeaways
- Understand Storage Risks
- Schedule Fall Service Early
- Complete Essential RV Winter Service
- Repair Critical Issues Immediately
- Address leaks, plumbing issues, and electrical problems before winter to avoid major expenses in spring.
- Fix worn seals, broken appliances, and faulty heaters to prevent breakdowns during the next camping season.
- Replace damaged hoses, fittings, and valves to ensure your RV is ready for the road after storage.
- Prioritize repairs that could lead to costly damage if left unattended over the winter months.
- Avoid Common Winterization Traps
- Select Professional Maintenance Options
- Choose a trusted RV winterization service provider for complete inspections and expert advice
- Schedule professional winterizing services for complex systems like engines, generators, and advanced plumbing
- Benefit from a full-service inspection that identifies hidden issues and ensures proper winter care
- Rely on experienced technicians to handle winterization products, repairs, and seasonal preparation for peace of mind
- Conclusion
- Frequently Asked Questions
- What RV winter service is essential before storage?
- When should I schedule RV winter service?
- Why is proper RV storage important in winter?
- Can I winterize my RV myself?
- What common RV winterization mistakes should I avoid?
- Do I need to repair RV issues before winter or can it wait?
- Is professional RV winter service worth the cost?
Key Takeaways
- Safeguard your RV from winter damage by draining water systems, applying RV-safe antifreeze and sealing gaps so that freezing temps and moisture don’t burst pipes, create leaks or mold. Make and adhere to an easy checklist so you don’t overlook sneaky components such as low-point drains, water heaters and interior appliances.
- Prevent moisture and interior damage with a dehumidifier or moisture absorbers, inspect seals around the roof and windows, and use a breathable RV cover. These actions assist in minimizing mildew, mold, and musty odors in extended storage.
- Maintain battery health over winter by disconnecting or removing them, storing in a dry, temperature-controlled environment, and checking their charge monthly. Clean terminals. Use a trickle charger or maintenance mode so your RV is ready to start in spring!
- Save your engine, fuel system, and generator by treating the fuel with a stabilizer and running treated fuel through the system. Change the oil and filters prior to storage. Add your generator to your winter checklist to save yourself from gumming, corrosion, and expensive repair work down the road.
- Minimize tire and exterior damage by inflating tires to the recommended level, blocking or moving the RV to prevent flat spots, and covering the tires and the exterior. Check seals, seams, and vents and patch any cracks so water, snow, and pests cannot get in.
- Opt for professional RV winter service if you’re uncertain about any step or have systems like generators or advanced plumbing. Scheduling fall service ahead allows our technicians the time to uncover hidden problems, finish repairs and save you costly shocks in spring.
===
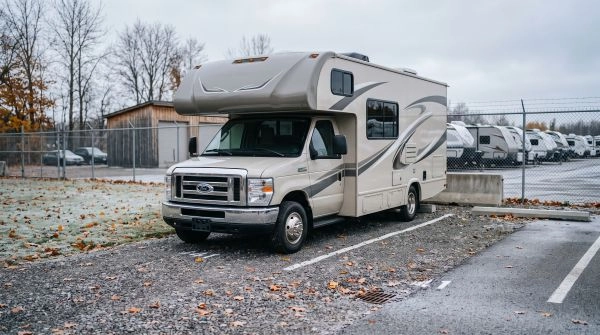
RV winter service refers to the things you do to shield your recreational vehicle against cold weather, freezing and extended storage. They use winter service to drain water systems, check seals, test batteries, and protect the engine and fuel lines from damage in freezing temperatures. Some easy inspections, such as verifying antifreeze levels and closing minor openings, prevent drips, cracked pipes and corrosion. Numerous individuals schedule RV winter service ahead of the initial frost or extended journeys in cold areas. Some select a pro shop, but many simple jobs are within reach at home with how-to guides and checklists. The following sections divide RV winter service into manageable, simple steps.
Understand Storage Risks

RV winter service is largely about reducing slow, sneak-attack harm while your vehicle is parked there for months in biting cold and moisture.
Moisture Damage
Moisture is one of the biggest storage risks because it’s so insidious. Trapped humid air creates mildew on upholstery, mold behind paneling and swollen cabinets or flooring. Easy measures such as operating a small dehumidifier in the RV or placing moisture-eating products in closets, under beds and in close proximity to the bathroom help in keeping humidity controlled. That comes in handy during cold winters and soggy, mild seasons.
Water usually sneaks in through small openings. Check your roof, window frames, door seals, and corner joints for hairline cracks or loose sealant and re-caulk or reseal as needed. A minuscule hole around a roof vent, for example, can allow meltwater from snow to seep in and percolate down into insulating layers and wall cavities.
For outdoor storage, a breathable cover minimizes condensation while protecting the body from snow accumulation and UV rays. Indoor storage wins out because it provides more shelter from severe weather and facilitates winter humidity control. Moisture monitoring is still required. Be sure exterior drains and exposed lines are fully drained so trapped water doesn’t freeze, expand, and force leaks into the interior later.
Long-term exposure to moisture and road conditions can also contribute to corrosion, so owners should consider rust protection and prevention as part of their vehicle maintenance strategy.
Battery Depletion
Batteries don’t like it when an RV is stored for months on end. The best thing to do is disconnect the house batteries and, if you can, take them out, particularly in areas with very cold temperatures. Keep them in a dry, temperature-controlled space and test charge levels approximately once a month, trickle charging as necessary.
A smart charger on maintenance or trickle mode keeps them ready without overcharging. Prior to storage, check the terminals, clean any corrosion, and tighten connections so you aren’t tackling weak starts or mysterious electrical issues come spring. This habit is crucial because extended, inactive stretches increase the danger of tire flat spots, so you desire at least your electrical system to be reliable.
Plumbing Failures

Water lines are extremely susceptible during freezing temperatures. Any water sitting in tanks, lines, or the water heater risks freezing and cracking pipes or fittings due to expansion. Completely empty all fresh, gray, and black tanks, as well as the water heater. Then open low-point drains to allow gravity to drain water pockets. In freezing or temperate areas, introduce non-toxic RV antifreeze via the plumbing to each faucet, shower, outside shower, and toilet valve.
Walk around and check exposed lines and fittings for leaks, worn components or loose clamps prior to stowing the RV. It’s even more likely if the RV sits in a location where temperatures fluctuate above and below freezing frequently. Verify your storage location has ample room and convenient access so you don’t have to jam the RV in a manner that stresses plumbing, tires, or body panels.
Schedule Fall Service Early
Booking RV winter service in early fall keeps you ahead of freezing weather and workshop backlog. It safeguards plumbing, heating, and safety systems prior to cold doing concealed harm that surfaces months later.
Schedule your RV fall service before the first snowflakes or freeze to save headaches. Once night temperatures begin to edge closer to 0 °C, water sitting in lines, pumps and fittings can freeze, expand and form small cracks you don’t notice right away. Those cracks are often leaks the following season when you pressurize the system once more. A lot of owners shoot for October or early November, but the point is to get it done before you have multiple consecutive nights of freezing temperatures. Early bookings mean service centers have more open slots, so you’re not crammed into a last minute appointment right before a cold front.
Leverage fall weather to get inspections, repairs, and maintenance done while your RV is still available. Cool temps and dry ground make it simple to slip under the chassis, examine brake lines, inspect suspension components, and inspect roof seals in plenty of daylight. A fall visit is a good time to test and service the furnace, make sure it ignites properly and that warm air flows to all vents. You can check out the water heater, fresh water system, and waste tanks while it’s still simple to drain and dry out.
Extra time for repairs or parts replacement before cold weather hits. If a tech discovers a soft spot on the roof, a worn tire, or a weak battery, you have time to order parts, compare options, and get the work done without pressure. A loose brake cable or a cracked hose is better to be caught and fixed now than to cause safety issues down the road, particularly on wet or icy roads. Catching trouble early can trim repair bills, as you are addressing minor defects before they lead to massive failures under winter stress.
Complete Essential RV Winter Service
Essential RV winter service is more than just parking and walking away. It touches on water, fuel, power, seals, and tires so parts do not crack, rust, or fail when you fire up again in spring.
1. Drain Water
Winterizing the water system is the most important, as frozen water can crack pipes, fittings and the water heater. Winterize Essential RV Service – Drain fresh water tank, grey and black tanks and water heater tank completely. Use the low-point drains and the tank valves so there aren’t pockets of water sitting in hidden areas.
Once drained, blow out lines with an air compressor if you have one, then run non-toxic RV antifreeze through all plumbing, including taps, shower, toilet, and outside shower. Complete Essential RV Winter Service. Use RV-specific antifreeze rated for severe cold, including Canadian-designed products, because they go lower and reduce the chance of micro-cracks.
Keep a checklist and physically tick off each part: fresh tank, grey tank, black tank, water heater, city-water inlet, outside shower, kitchen sink, bathroom sink, shower, toilet, washer connections if fitted, and any water filter housings. Open every faucet and low-point drain as you go to ensure lines clear completely and no water remains in elbows.
2. Stabilize Fuel
Dump in a fuel stabilizer that suits your fuel type, then run them both for a few minutes so treated fuel makes its way to lines, injectors or carbs. Fill tanks as close to full as possible to reduce air space. That is where condensation forms and rust can develop inside metal tanks.
Change engine, generator oil and filters before storage so acidic by-products and grit do not sit on bearings and journals for months. Many owners use well-known stabilizer brands. The key steps stay the same: measure the dose for the tank size, add before the last short drive, then run both engine and generator long enough to pull treated fuel through.
3. Disconnect Batteries
To prevent batteries from draining down, disconnect or remove them prior to extended storage. Toss up the negative cable first (typically black) and then positive to reduce the risk of short circuits while you toil in cramped quarters around the metal.
Store batteries in a cool, dry place on a firm base, not right on damp concrete. Check voltage every four to six weeks and recharge when needed. This simple habit does more for battery health than almost anything else during winter.
Scrape off white or green buildup, clean the terminals, then add a thin coating of dielectric grease to slow corrosion over the months to come. A little wipe, a little brush, and a little grease can add years to a battery’s service life.
| Battery type | Winter care step | Notes |
|---|---|---|
| Flooded lead‑acid | Charge monthly, keep above ~12.4 V, vents clear | Check fluid level before storage |
| AGM | Charge every 6 to 8 weeks | Do not overcharge, use a smart charger | | Lithium (LiFePO4) | Observe manufacturer’s low-temperature guidelines, typically 20 to 60 percent charge | Most require specific chargers in cold conditions.
4. Check Seals
Moisture discovers weak spots quickly in winter, so a seal check counts. Check door seals, window seals, roof seams, and anywhere two panels join together. Keep an eye out for cracks, gaps, dried rubber, or loose trim where wind-driven rain or meltwater can sneak inside.
Reseal or replace any torn weatherstripping prior to storage. Apply RV-safe sealants to roof seams and fittings, not some random hardware caulk that will crack because it won’t flex with the body. A bead of caulk around vents, antennas, ladder mounts and trim can seal slow leaks that manifest themselves as soft spots months down the road.
Create a checklist so you do not skip likely trouble spots: entry door, storage doors, slide-out seals, windows, skylights, roof vents, air-conditioning penetrations, marker lights, ladder and rail mounts, and around the front and rear caps. While there, lightly lube locks and hinges so they do not creak, jam, or snap after sitting in cold air.
5. Protect Tires
T
Tires bear the entire weight for months while an RV rests, so they deserve a little love before that first freeze. Pump each tire up to the manufacturer’s suggested storage pressure, which is typically near the running pressure. Always consult your sidewall and manual because under-inflated tires are prone to flat-spotting.
If you are able, park on level blocks or boards so the tires don’t rest on bare ground or ice. Some owners roll the RV a few feet once a month to load shift about the tread. This little action can aid in minimizing flat-spotting, particularly on the heavier motorhomes.
Put on proper tire covers to block UV rays and protect the rubber from snow and biting wind. This easy step reduces aging and cracking. Wash down the awning and allow it to dry thoroughly. Then retract it so leaves, twigs, and tree sap are not trapped, staining the fabric or stressing the arms through the winter.
Essential RV Winter Service – Before you walk away for the season, inspect each tire for sidewall cracks, deep cuts, bulges or outdated date codes. Alberta’s government also provides an RV safety checklist covering items such as tires, wheels, lights, batteries, hoses, appliances, and other pre-trip checks. If it looks sketchy, schedule a replacement prior to spring travel. A full essential RV winter service such as this positions you for the post-winter check up you’ll need prior to safe driving once more.
Repair Critical Issues Immediately
Fixing critical issues before winter strikes reduces the chance of expensive repair bills down the road. Cold, moisture, and long storage all make little problems blow up quick, so it’s worth it to fix them now before you’re no longer able to go out and exercise every system.
Address leaks, plumbing issues, and electrical problems before winter to avoid major expenses in spring.
Inspect your roof, windows and seams for leaks and repair any loose caulk or cracked sealant. Even a minor drip can saturate insulation and wall panels over a couple of months, creating mold and rot that will take far more to repair than a reseal now. Plumbing requires the same urgency. Pipes under pressure can burst in subzero temperatures, so drain tanks, blow out lines if necessary, and repair any slow leaks, cracked fittings or stiff valves before you winterize. Fix immediate electrical issues. Loose wires, corroded connectors or failing breakers can create shorts, dead outlets or even fire risk and the damage usually doesn’t reveal itself until the RV has sat all winter.
Fix worn seals, broken appliances, and faulty heaters to prevent breakdowns during the next camping season.
Door and hatch seals that don’t close tight anymore let in cold air and moisture that challenge heaters and welcome condensation and rust. Fix them right away instead. Test all critical appliances, such as the refrigerator, stove and water heater, and fix weak igniters or burners before they fail during a trip. This includes heating systems, which should be meticulously inspected. A defective furnace or space heater is tough to repair on the road, and ignition problems are frequently missed despite being a top contributor to winter downtime.
Replace damaged hoses, fittings, and valves to ensure your RV is ready for the road after storage.
Walk through the RV’s fresh, grey, and black water lines and look for cracked hoses, worn fittings, or sticky valves. Replace anything questionable. Rubber and plastic age quicker in cold and in UV light, so parts that “barely” seal now might leak after a couple months of sitting. Fuel and coolant hoses are equally deserving. A split coolant hose or loose fuel line on that first spring drive can terminate your journey and wreck your engine.
Prioritize repairs that could lead to costly damage if left unattended over the winter months.
Begin with anything that, if ignored, could infect or harm other areas. Roof leaks, soft floors, and wet walls rank high because they damage structure. Next are engine and starting system repair concerns. Batteries lose as much as fifty percent of their cranking power in sub-zero temperatures, so test voltage, clean terminals, and replace weak batteries before storage. Good battery maintenance can be the difference between a clean get-home or a frosty extended roadside linger. Inspect spark plugs and ignition wires annually to reduce misfires and hard starts, and address any rough idle or slow crank immediately as postponing repairs frequently results in more involved and costly service down the road. Utilizing winter-grade oils reduces engine strain, assists the engine in spinning more freely, and smooths out cold starts, which further lightens the load on both starter and battery.
Avoid Common Winterization Traps
A lot of winter damage problems stem from little steps that people omit or hurry through. Winter service is about the whole RV: plumbing, structure, appliances, power, and the environment you store it in.
Here’s what you want to be sure of: check for any sign of water intrusion before you put her away. Inspect for soft spots on floors and walls, peeling caulk around windows or roof seams, and loose trim where water can infiltrate. Repair these immediately with new sealant, screws, or patch kits so moisture and freezing temperatures don’t transform a minor leak into structural rot. Sealing exterior gaps helps block pests, which is simpler if you eliminate food, crumbs, and open packages in the cabin.
Avoid Typical Winterization Pitfalls
Storing the RV in a dry, temperature-controlled environment when possible minimizes the chances of frozen plumbing, mold, and cracked sealants. If you can’t store it indoors, cover it with something breathable and park on hard, drained earth so that moisture doesn’t collect under the chassis. Add battery care to this step. Disconnect and remove the battery or connect a quality battery maintainer to avoid damage from deep discharge over several months.
Winterization has an environmental twist as well. Used RV antifreeze, old oil, dirty filters, and fuel additives all register as waste that can damage soil and water if dumped. A lot of places control this under general rules like the Pollution Control Act or equivalent, so see what your local regulations and recycling facilities say. By disposing of waste properly, you protect your RV and the destinations you visit.
Not winterizing the plumbing is the most expensive blunder. Undrained tanks, low-point lines, and water heaters can freeze, expand, and crack plastic or copper, which leads to bursting pipes and splitting fittings come spring. Water-using appliances like washers, ice makers, and coffee makers require attention too, as water trapped in internal lines can freeze, even if your main system seems good.
Improper Antifreeze
With the right antifreeze and proper application, you’ll keep your plumbing system safe throughout freezing weather. Use only non-toxic, RV-approved antifreeze formulated for potable water systems. Household automotive antifreeze contains ethylene glycol, which is toxic and unsuitable for drinking-water lines. A NOT SO OBVIOUS AUTO WINTERIZATION TRAP: Before you add antifreeze, be sure to completely drain the fresh tank, water heater and low-point drains so you don’t dilute the product and weaken freeze protection.
Use the antifreeze manufacturer’s mix ratio and volume recommendations, but consult your RV owner’s guide for how much your system can hold. Never mix different antifreeze types, even if both are “RV safe” because blends can alter the freeze point, create sludge, or damage rubber seals and plastic fittings. Don’t forget to bypass your water heater if your coach is equipped with a bypass kit. Filling a big heater tank with antifreeze is a waste of product and complicates spring flushing.
Use this basic checklist to flush and fill RV plumbing lines with antifreeze:
- You turn off the water pump and unplug from city water.
- Don’t just winterize your RV – avoid these common winterization traps! Drain the fresh water tank, water heater, and gray and black tanks completely.
- Don’t fall for common winterization traps.
- Put the water heater on ‘bypass’ mode if it has a bypass valve.
- Close all faucets, then add RV antifreeze to the suction side of the water pump or hand pump at the city water inlet.
- After turning on the pump, open each faucet one at a time, beginning with the one farthest from the pump until pink antifreeze appears. Then close it.
- Run antifreeze through the shower (including the outdoor shower) and toilet, and into all traps and drains so P-traps and valves are protected.
- Top off each drain with a bit more antifreeze and add it to the waste tanks through the toilet to preserve valves and seals.
Neglected Generators
Your generator needs winter care as well, or it may not fire when you need it next season. Old oil and fuel with contaminants can cause wear and gumming as it sits. Pre-storage oil and filter changes provide the internals with fresh lubrication, which benefits you when you turn the crank after months of dormancy. Avoid common winterization traps like adding fuel stabilizer to the tank and then running the generator under light load for 10 to 20 minutes, which pulls treated fuel through the carb or injectors so they are less likely to varnish.
Don’t fall into the common winterization trap. Take time to check the generator’s exhaust for rust holes, loose clamps or cracks that could allow fumes into the cabin down the road. Inspect electrical connections for loose terminals or corrosion and clean or tighten them accordingly. If the RV is going to be in a very cold region, heed the generator manufacturer’s guidance on suggested oil weight and storage limitations for your specific model.
Add generator steps to your primary winterization list so they don’t get an afterthought. Use a simple short list covering plumbing, appliances, batteries, generator, and structural checks — an easy way to avoid missed tasks and surprise repair bills in spring!
Select Professional Maintenance Options
Professional RV winter service offers an additional level of protection that simple DIY efforts frequently overlook. It helps keep your warranty intact and your systems secure, which is important when you depend on the rig for extended road trips or off-grid residencies.
For complex winterization needs, consider professional RV, motorhome and bus repair services that can inspect mechanical, electrical, plumbing, and safety-related systems before storage.
A quality winterization shop won’t just drain water lines and add antifreeze. It inspects the entire RV from top to bottom including the roof, seals, slide-outs, appliances, and safety equipment. Seek out vendors that serve many RV styles, from camper vans to huge fifth wheels, and that state winter service as a standard part of their work, not an incidental add-on. Inquire whether their inspection includes appliance warranties, as certain brands require evidence of routine professional servicing to maintain coverage. Good shops detail what they do, what products they use, and why in terms you can understand.
Schedule professional winterizing services for complex systems like engines, generators, and advanced plumbing
Engines, generators, and boutique plumbing aren’t places you want to guess. For many motorhomes, oil changes and coolant checks are best left to trained personnel, particularly if the chassis manufacturer has rigid servicing requirements. The same goes for large generators, which require proper load testing, fuel care, and detailed service logs. Cutting-edge plumbing, such as heated lines, mixing valves, built-in filters, and so on, can conceal trouble spots that reveal themselves only when the temperature drops, so a pro ought to pressure-test and winterize these components with specialized equipment.
Benefit from a full-service inspection that identifies hidden issues and ensures proper winter care
Annual professional inspections catch small issues before they become big. A full-service winter visit can flag loose roof seams, worn brake parts, or a 30K fifth wheel hitch that’s seen better days and wouldn’t quite make it through a safety check. RV owners managing multiple vehicles can also benefit from scheduled fleet service and preventative maintenance to keep seasonal inspections and repairs organized.
Rely on experienced technicians to handle winterization products, repairs, and seasonal preparation for peace of mind
For DIY-phobic owners, handing off to a pro cuts stress. Experienced technicians are familiar with what RV plumbing-safe antifreeze to use, how to safeguard seals and gaskets, and when it’s better to replace rather than patch. They log records that back up warranty claims and help schedule future service. A lot of people go this route for peace of mind, knowing essential systems are inspected by a person who encounters the same failures every season and knows how to catch them early and stop them.
Conclusion
RV winter service takes time, money, and a ton of stress. Freezing, ice, and prolonged storage are hard on waterlines, seals, roofs, and batteries. Little leaks become huge repairs quickly. A loose roof seal leads to rot. A compromised battery can fail for good.
Fall service plans come to the rescue. A scheduled calendar date trumps a last minute frenzy every time. Some owners maintain a basic list: water lines, tank maintenance, roof inspection, tire inspection, and battery maintenance. That list by itself eliminates a lot of risk.
So for next steps, schedule a service date, select a trusted shop, and begin a checklist for your rig. Your spring start will be a lot smoother.
Before returning to the road, review Alberta’s guidance for RV and travel-trailer safety, including pre-trip checks, towing requirements, braking, weight, and safe road operation.
Frequently Asked Questions
What RV winter service is essential before storage?
Winterizing your RV means winter service like double checking the roof and seals, servicing the engine and generator, checking the battery, changing fluids if necessary, and winterizing the plumbing system. These steps minimize freeze damage, leaks, and starting issues when you return to your RV.
When should I schedule RV winter service?
So, the best time to have RV winter service done is in early fall. Service centers are filling up fast as the temperature dips. Booking early keeps you out of the rush, secures quality work, and addresses problems before cold weather exacerbates the damage.
Why is proper RV storage important in winter?
Improper storage can lead to water damage, frozen pipes, tire flat spots, dead batteries and pest infestations. Well-done winter service and storage prep safeguards your RV’s value, prevents expensive repairs, and makes certain it is prepped for safe spring travel.
Can I winterize my RV myself?
Yes, a lot of owners even winterize their RV themselves with antifreeze or blow-out methods. Get a professional service if you’re unsure, have a complicated system, or see leaks or damage. Winterization gone wrong can mean expensive plumbing and appliance repairs.
What common RV winterization mistakes should I avoid?
Typical mistakes are skipping water line winterization, forgetting the water heater, overlooking roof and seal inspections, leaving food behind, and neglecting the battery. These mistakes frequently result in leaks, mold, frozen pipes, and electrical issues when spring arrives.
Do I need to repair RV issues before winter or can it wait?
Head off disaster with RV winter service: Things like roof leaks, soft floors, plumbing leaks and electrical faults need to be repaired before winter. Chill and dampness tend to aggravate these issues. Repairing them sooner preserves your RV’s integrity, security and lifetime maintenance expenses.
Is professional RV winter service worth the cost?
Professional service may be worth it if you don’t have the time, tools, or experience. Technicians understand exactly where stealth problems start and follow a time-tested checklist. This minimizes freeze damage, increases safety, and typically pays for itself in repair savings later.